Makeup Packaging (Chatter)

When it comes to cosmetic products, what do you value the most? Form or function?

Personally, I place performance primarily. Packaging comes second; if a product isn’t good, it could have the most elegant packaging ever and not matter.

Maybelline Instant Age-Rewind Concealer, for example, is a fantastic drugstore under-eye concealer…but the applicator is silly. I don’t loathe it as much as some others do, but I do think it could have been executed better. To dispense the product, you twist the case and it clicks as it slowly advances the product up to the built-in sponge-esque puff applicator. It isn’t ideal for application, it isn’t as hygienic as many consumers would prefer, and it is difficult to get the product onto a different applicator if you want to try it that way. The product inside the tube is fantastic, though, so many of us deal with it; it is well-worth it.

That said, there are times when packaging can be a purchase-deterrent. When I choose to invest in a product, I expect greater care to be put into the packaging during the design and manufacturing process. Let’s look at three products, here.

Makeup PackagingMakeup Packaging Comparison
elf Studio Blush
, $3 / Benefit Coralista, $28 / Hourglass Ambient Lighting Blush, $35
  • e.l.f. features simple, uncomplicated packaging. It is slim (bag-friendly!), straightforward, and features a window in the front so you can view the shade within while it is closed. There is a small mirror inside. It snaps shut.
  • Benefit Coralista, and all of their face powders, comes in a box. The box appeared to be made from thin, reinforced cardboard or paper that is printed with, in Coralista’s case, pink leopard print and some other motifs – I think palm trees, but I really have no idea. This makeup packaging does not latch to close.
  • Hourglass features classy, sleek packaging. On top of being aesthetically pleasing, it houses the product well, closing with a reassuring snap. If I bought one of these and it took me 20 years to finish, the packaging probably wouldn’t make me feel dated or juvenile.

Read more

My Lipstick Looked…Different

Last year, I went to a MAC counter with a friend to find a lipstick to wear to my wedding. It was winter, I was pale, and I was seeking a My-Lips-But-Better shade that was slightly more pink than my natural lipcolor. I wound up choosing Brave, a satin finish; I loved how it looked with Soar pencil underneath. It was subtle and made me look like me (though I enjoy reds, I feel most comfortable in MLBBs and neutral pinks), which was important considering the occasion.

MAC Brave LipstickMAC Brave Lipstick

Fast forward to late spring! I had started my sunless tanning routine with Million Dollar Tan’s excellent Cabana Tan lotion line. I was tan and golden, and felt good about not harming my skin in the process. I started refining what my day-of makeup was going to be – applying, tweaking, etc. – most times sans lip because, come on. I knew what the lip looked like.

One time I decided to finish it properly, lip and all. I was so excited to be done, thinking, “Oh yes, I nailed this!”

Except I wasn’t as enamored of the lip as I remember being. What?! I remember being so enamored of the shade when I bought it. Was it the cruel salesfloor lighting within Macy’s? No, I had photos of it. In natural light, even. It looked so cool, almost making my lips look ashy…what the hell happened? Lipsticks don’t just change color!

It had only been about a month since I started sunless tanning, but I had reached where I wanted to be – it was enough to change the effect of the lipstick drastically against my skin. Thankfully, the arrival of my Glambot order saved the day; armed with MAC Cosmo, I was able to blend the two lipsticks on my lip (over the Soar lip pencil) to achieve what I wanted on my newly-tan skin.

Because of that, I put Brave away and hadn’t reached for it in a while. Recently having returned to my palest shade (props to Million Dollar Tan – it really lasted!), I reached for it this week and found that it looks good again.

In short, if you tend to be a bit of a chameleon depending on the season, don’t be surprised (or upset!) if certain shades (of lipstick or blush, especially) don’t flatter as much as they did at another time. Certainly don’t do anything rash like throw a product away over it. With lipstick, try mixing it with another lipcolor (or even just topping it with a gloss to alter it a bit). If that doesn’t work,  give it time, wait for the next season, and try again; your skintone has a huge impact on these things.

I’m thrilled to have this particular lipstick back in my rotation. Foundation/concealer being the exception, have you ever found this to be the case with a product in your collection (flattering when purchased, not so much in a different season)?

Maybelline Creamy Matte Lipstick – Divine Wine

Lipsticks are one of those fun items that you don’t need a ton of time to test in order to fully evaluate. Despite the fact that I don’t wear them often (they’re a little high-maintenance for my day-to-day tastes), I love the look of a matte lip. When I heard that Maybelline added this new Creamy Matte Lipstick formula to their Color Sensational line, I was damn excited. I actually saw them on YouTube first before seeing them in a store, on a blog, etc – Nicole Guerrero was wearing Touch of Spice in a recent video and I was like, “Yep. I need dis.” I looked around and could find no information online, not even on Maybelline’s site.

A few days later, I saw other YouTubers sporting shades from the Color Sensational Creamy Matte Lipstick line and the message was clear, “go to Target.” Next time I was there, armed with a new coupons (no shame in trying something new with one, after all), I went to get Touch of Spice and Divine Wine. They were out of Touch of Spice, but I did get Divine Wine to share with you.

Maybelline Creamy Matte Lipstick - Divine Wine

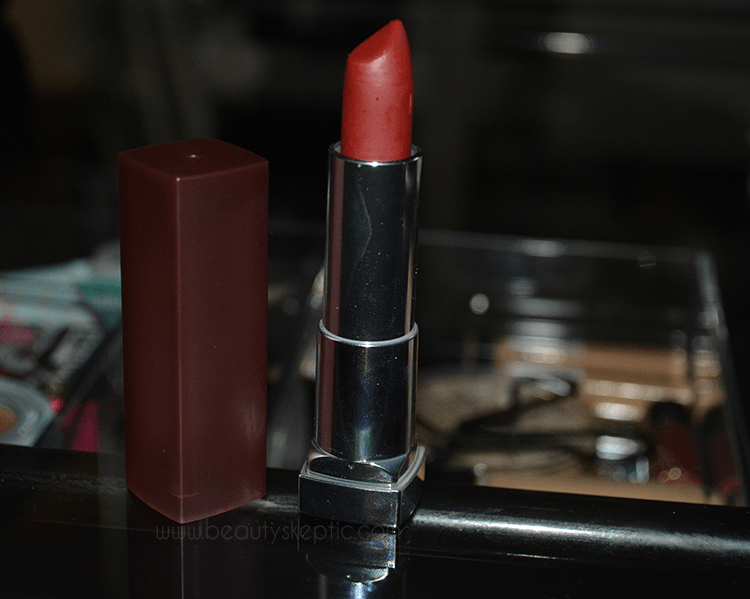
The caps on the Creamy Matte Lipstick shades are identical: frosted for a matte look, but this otherwise looks like many of the other Color Sensational lipsticks from the outside.

Maybelline Creamy Matte Lipstick - Divine Wine Case

So dark! The flash makes this look not quite as dark as it is. It isn’t like… Nyx Soft Matte Lip Cream in Transylvania or Nars Train Bleu dark, but it is a pretty deep wine red.

Maybelline Creamy Matte Lipstick - Divine Wine - Open

Swatched. For reference on how dark it is, Maybelline Creamy Matte Lipstick this is sitting next to a well-known shade, Stila Stay All Day Liquid Lipstick in Beso. Should have let Beso dry, but I was rushing.

Maybelline Creamy Matte Lipstick - Divine Wine Swatch (Stila Beso above for comparison)

Though I will sometimes wear a bold red lip, I pretty much never wear a dark lip. In fact, I can remember the last time I did, not counting Halloween scenarios – my mom had a dark burgundy(ish)? Clinique lipstick ages and aaaages ago. I pilfered it. I was not even a teenager yet. That was all.
I am not vampy! I like sheer washes color on my lips and clean eyeliner. I am out of my comfort zone! Applying it, eeek, it is so dark. Just applied:

Maybelline Creamy Matte Lipstick - Divine Wine, Applied

And I love it! Again, slightly ligther in the flash, but trust that this is very fall appropriate.

Despite being called, “Creamy Matte Lipstick,” this is definitely more of a satin-matte finish; the lighter shades are slightly more matte. I think this finish is flattering with this color, personally, but if it want it so-matte-its-flat, this may not be the formula/color for you. It doesn’t feel dry going on – some matte lipsticks can skip or tug on your lips during application, leading to mistakes or uneven-application, nearly necessitating use of a lip brush. Not these! They glide on pretty easily and have great color payoff in one pass. They aren’t as unforgiving as a classic matte lipstick (I’m looking at you, MAC Retro Matte formula – I’ve seen what you’ve done to lips!) but I chose to exfoliate and treat prior just in case. So far, I haven’t noticed any feathering or sass from this lipcolor, but I would probably use a liner (if I had an appropriate color) with this one just in case.

I noticed, also, during application and wear, that the scent of the Creamy Matte Lipsticks remind me of the scent of the Nyx Soft Matte Lip Creams. I’m sure they share some common ingredients, though I’m not sure what they are. I would wager that it is whatever allows them to apply easily and remain matte. I love my Nyx Soft Matte Lip creams, but I already have a strong preference for this type of lipcolor to be in a lipstick form rather than a tube with a doe-foot applicator.

I got about about 3.5 hours of wear before needing to reapply, but that includes drinking two glasses of tea and eating dinner. I heard and confirmed that it wasn’t a punk about reapplying, but even the Nyx Soft Matte Lip Creams can be punks when it comes to reapplication. To be fair, I think expecting a lipstick to last through eating and drinking is entirely unrealistic – and this one does not claim to be long-wearing, so I am happy.

It is so damn new that even now, almost a week after I’ve purchased them, I cannot find them online anywhere. Not Amazon, not Target, not drugstore.com – but I will be sure to update you with a link as soon as I find one. In fact, I have another shade to share with you at some point – I’ll hold off until I can get a dang link for you.

Are you into matte hues? Seasonally-appropriate ones? Will you try one of the new Maybelline Creamy Matte Lipsticks, or stick with something more familiar like, say, a Nyx Soft Matte Lip Cream?

L’Oreal Voluminous Miss Manga Mascara

L’Oreal Voluminous Miss Manga Mascara isn’t exactly brand-new cutting edge at this point, but I never claimed to only bring you the newest of the new. You see, sometimes when an interesting product launches, people lose their minds and declare that it is glorious and perfect without giving themselves adequate time to try it out and see how it behaves. To borrow from a Lonely Island song, “Nah, that ain’t me.”

As much as I enjoy bareMinerals Flawless definition, I cannot swallow an $18 per tube mascara habit (and I just missed the Ulta 21 Days of Beauty 50% off sale day for it), so I will keep trying drugstore options until I find, “the one.” I picked up a tube of L’Oreal Voluminous Miss Manga mascara in Black-Brown when it was just launching, but only opened it last month to avoid having a ton of tubes open at a time to minimize waste).

Let’s check it out!

Here’s the tube – I personally prefer sleeker tube designs, but this one has a flat side that tapers on the cap for easy grip during application.

L'Oreal Voluminous Miss Manga MascaraL’Oreal Voluminous Miss Manga Mascara

Read more

How I Learned to Love my Maybelline Color Tattoos

To date, I have only owned two Maybelline Color Tattoo pots, both from the Metal collection. I own Barely Branded, a shimmery beige, and Inked in Pink, a cool, shimmery mauve-pink. I have barely touched them since the month I bought them, which was shortly after they were all the rage.

Maybelline Color Tattoo MetalMaybelline Color Tattoo

There is nothing wrong with either Maybelline Color Tattoo that I own, they just didn’t suit me and my application preferences. Cream shadows aren’t my thing. I just haven’t gotten the hang of them. Most of them suggest that you apply with a finger – which I don’t care for. I can’t get precision with a finger, and even with freshly-washed hands I would be needlessly adding bacteria to a cream product (I’m not a germophobe, but still!) Traditional shadows and pigments are my comfort-zone. I once tried some flat brushes to try to pack the color on but it never worked out quite the way I was hoping…so they sat in my drawer for months.

I threw my Inked in Pink Maybelline Color Tattoo in my bag no plan in mind other than thinking the color might be nice with the top I was wearing. I grudgingly applied a layer to my lid with my ringfinger, then added some of Für Elise from Kat von D’s Ladybird palette at the outer edges and blended in. It looked alright, I thought, but the edges were now way too matte sitting against the frosted, almost foiled pink.

I actually had another clean brush handy – one of three Real Techniques brushes I own, the Shading brush. RT’s shader brush is not as much of a shading brush as it is a flattened (but not flat) blender. Despite the quality and affordability of these brushes, I never feel like I use this one as much as I could/should. I had already cleaned my ringfinger off, so I said, “to hell with recommendations!” and picked some up with the brush. If you aren’t familiar with the consistency of a Maybelline Color Tattoo, let me bring you up to speed: though they are cream shadows, they are very firm; stiff, almost. I swiped my brush across the surface a couple times until I was satisfied, then patted the brush over Für Elise to give it a sheen.

Hey, that worked pretty well!

The brush was small enough, despite it’s almost fluffy texture, to allow me to precisely place the Maybelline Color Tattoo where I wanted it…so I decided to intensify the pink across the rest of my lid up to my inner corner. It worked superbly. Like shockingly well. I finally know how to use these in a way that actually suit my preferences! I will actually use them now!

If you’re wondering, at this point, why you should care – let me clarify: I learned something today. We all have products that we don’t feel work for us after a few tries. Don’t give up immediately (bad foundation matches/things that cause breakouts excepted) – give these products a chance; try to experiment with them! In a normal situation where I had my entire collection and brushes at hand, I probably never would have thought to grab that brush for a Maybelline Color Tattoo. Having only a few things at hand forced me to be creative with how I used the product and ultimately led me to find a better way (for me) to apply the product.

We can learn a lot by shopping our stash and thinking outside of the, “box,” that is recommended usage (be safe though!) – to think, I might have tossed both Maybelline Color Tattoo pots during my next de-stashing! I hope this helps you make the most of your makeup, and I hope you have an excellent weekend.

Autumn Gold and Violet Eye Tutorial

I’m not some YouTube vlogger goddess, but occasionally I like to throw up a tutorial for you. Because I more-or-less missed summer anyway, I’ve been ready to embrace Autumn for a while though we don’t actually hit Autumn for almost two weeks. Last Friday, I did a nice warm Autumn Gold and Violet Eye look (trust – it works) and liked it enough that I wanted to share.

What I used (feel free to adapt based on what you already have!):

  • Urban Decay Eyeshadow Primer Potion (BONUS: Nyx Milk)
  • Virgin, Naked, Buck, and Half Baked eyeshadows from Urban Decay’s Naked palette:
    naked
  • Violetta, Fine Wine, and Violet Echo eyeshadows from the Coastal Scents 252 Palette:cs252
  • Desired black liner of choice – on Friday I used Stila Stay all Day, for this, I used a L’Oreal gel
  • Lash Curler
  • bareMinerals Flawless Definition mascara or whatever makes you happy
  • Flat Shader Brush (or two, if you like)
  • Crease blending brush – something with a fluffy dome to place and blend color in your crease (or two, if you like)
  • Precision blending brush – doesn’t have to be special, just something to help blur any harsh lines

Read more