BeautyBlender vs Bundle Monster Sponge

The Beautyblender is a holy grail tool for many makeup fanciers and artists, thanks to its versatility, ease of use, and ease of care. That said, at a regular retail price of $20 (but less online), it is no wonder why people are looking into more cost-effective alternatives. Some might spend $20 on a brush and not think anything of it, but a sponge does have a limited lifespan and would need to be replaced far more frequently, even when well-cared-for, than a brush.

Several companies have similar products – there’s a Sephora branded one, a Real Techniques introduced one, and there are several others from various companies, including some, generic ones. Bundle Monster actually has a set of four sponges for around $10-15 online. I’ve seen participants in various communities say that there is no difference when it comes to the Beautyblender vs Bundle Monster sponges and that you should save your money. I also have a friend who exclusively buys the less costly variants, swearing  up and down that they are identical.

I endeavored to do a Beautyblender vs Bundle Monster Sponge comparison for a while. Then, a friend bought the 4pc Bundle Monster pack and decided she wouldn’t need all four, and was sweet enough to give me two on Friday, so I was equipped…for science!

I unboxed my two sponges and immediately noticed that they were a denser foam, former to the touch. The base of the teardrop Bundle Monster sponge (mine is purple), which is what I will be comparing to the Beautyblender, was wider and slightly flatter so that it sits up on its own if you set it down that way. It is also ever-so-slightly larger, as you can see here:

BeautyBlender vs Bundle Monster Spongebeautyblender vs bundle monster sponges

Please pardon my slightly less-than-pristine Beautyblender, as she is well-loved. I then wet them simultaneously. It did take a little bit more effort to dampen the sponge, and required more squeezing. When I squeezed it after its initial saturation, some suds oozed out – err, what? I continued to saturate and ring it out until that stopped, about five times. At its largest, it is also larger than the original Beautyblender. This is not always a good thing, though, as it can be more difficult to blend in narrower areas like around your nose, eyes, etc. Here they are dampened (enlarged) and wrung out – I realized after the fact that I am a damn fool and should have included something for scale so you could get an idea of size before and after, but gimme a break. (If you’d like to see the wet vs dry Beautyblender vs Bundle Monster Sponge comparison I’m happy to oblige – just let me know in the comments!)

BeautyBlender vs Bundle Monster Sponge

BeautyBlender vs Bundle Monster Sponge

I was considering doing a Beautyblender vs Bundle Monster Sponge side by side application comparison, but decided against it for now – let me know in the comments if that is relevant to your interests. Instead, I slapped on my foundation with the Bundle Monster Sponge. As I always do when using a sponge like this, I pumped one pump of foundation to the back of my hand, picked up some of the product with the sponge, and began to stipple it onto my face. Two things I noticed immediately: 1) it feels very rubbery and bouncy on your face – it actually bounces and 2) it absorbed more product than the Beautyblender, and did not allow me to deposit all of the absorbed foundation onto my face.

With the Beautyblender, I use about 1.5 pumps of my foundation (which is currently MUFE HD Invisible Cover). The Bundle Monster Sponge had me use about 2.25 pumps to achieve similar coverage. I definitely did not expect this, since the BM sponge is a denser foam – if anything, I’d have thought it would absorb less. After a couple minutes, I was able to blend out my foundation to my desired coverage (medium-ish, I wasn’t doing anything special except guinea pigging). It did the job, but it took a little longer.

It is also important to note how they wash and how easy they are to care for. The BM sponge took more elbow grease to thoroughly clean both with baby shampoo and a Blendercleanser Solid, but did eventually come completely clean without staining. It took slightly longer to fully dry, but that can also be attributed to the density of the sponge.

In all, the Bundle Monster Sponges are an acceptable alternative to Beautyblenders, but it is important they are not identical in form or performance. It takes longer to achieve the same result with the Bundle Monster Sponges, they do not clean quite as quickly. At this point, it is difficult to tell how long they will last, longevity-wise –  but even if they last only 1/4 as long each, the savings are still there at only $10-15 for a pack of four. That said, it is also possible to find Beautyblenders for less than regular retail (Amazon.com, etc).

Disclosure: Neither Beautyblender or Bundle Monster know who I am, as far as I know. I just tried this on my own and wanted to share – I recommend both products, but only you can know your needs. That said, some of the links here are affiliate links – this means I may get a very small percentage of the sale if you decide to buy something. I’ll only tell you that something is awesome if I have verified it myself!

Worth it? GlamGlow ThirstyMud

GlamGlow was conceived by a couple in Hollywood who were looking to help out some friends’ skin concerns. What started as a favor, friend-to-friend, ultimately developed into a wildly successful and popular skincare brand. Only available for retail for three years, they have received scads of awards for being awesome and are used personally, in salons/spas, and by the professionals the product was originally intended for.

GlamGlow ThirstyMud

GlamGlow ThirstyMud treatment

I’ve made no bones about the fact that I do not believe in miracle products. The purveyors of the YouthMud Tinglexfoliate and the SuperMud Clearing treatments released GlamGlow ThirstyMud around (I think) holiday season 2013.

Resources I generally trust thought highly of the brand, so when some of these people came forth raving about the GlamGlow ThirstyMud mask, I was intrigued. Though the mask can be applied and removed, the consensus was the same: slap it on before bed. Go to sleep. Wake up and be stunned by how awesome your skin looks (and feels!). Women reported that their husbands and boyfriends (who, per them, do not usually notice) were also noticing and commenting on the difference.

Kicker? The $69 price tag for 1.7 ounces of product. OUCH. I like masks, but that’s over $40 per ounce. Does it have gold in it? I promptly forgot about the product because it is simply too much to ask (for my needs and skin).

Read more

Chatter: Adventures in Hair Drying

Adventures in Hair drying

I’d just like to share with you a brief anecdote from Tuesday night.
All products mentioned are in the picture above!

1. Wash hair. It’s time, you know? Plus, you need to get that dry shampoo buildup out (it is awesome, but is not meant to stay forever). Condition liberally, leave it in for a few while you wash your face and body.

2. Procrastinate about leaving the warm shower. It’s cold on the other side of the curtain. Pout like a child, grudgingly dry off and step out.

3. Hastily towel dry hair so it isn’t sopping or considering becoming icicles. Start a blowout with drenched hair? You’re gonna have a bad time.

4. Comb through your mane with a wide-toothed comb to detangle. We’re civilized folk, after all.

5. Rummage through the drawer o’ hair goop. Grab your Paul Mitchell Super Skinny Serum and Ion knockoff (from Sally Beauty, left) of Aquage Uplifting Foam (real, right) .

6. Toss most of your hair to one side and section about an inch above the ear. Try to spray it on like Kate from the Small Things Blog shows us.

7. Instead, do a horrible job at it and somehow wind up with it on the door of the bathroom (I don’t even…). Wipe off the door before your fiance thinks you were doing grade-school science experiments in the bathroom with hair products as reagents. Don’t be like me.
Also, don’t use hair products as reagents – a lot of them are pressurized and/or flammable. The more you know.

8. Deal with the now-intrigued cats on the other side of the door who were curious about what was getting the inside of the door (aka you wiping the root-lifting mousse off the door).

9.  Apply one pump of Super Skinny to the mid-lengths and ends. This step was pretty anticlimactic. Wipe your hands off because it feels weird.

10. Rough dry upside down with an easily-obtained dryer (though I guess a difficult to obtain one would work just as well), trying to get the scalp area (where you applied too much foam goop) driest. Flip back over, make sure the roots are dry.

11. Move onto the ends with an awesome gigantic round brush (4″!) that you require (because your hair is almost waist length when it isn’t being wild and crazy and using a 2.5″ barrel would be awful).

12. Get bored 7/8 of the way through your adventures in hair drying (with nearly-dry hair!) and decide to go finish making dinner.

This is a pretty normal DIY blowout for me. Occasionally, I’ll really take the time to go through the process properly. But really, it is important that your routine feels like something you want to do, and not like a chore. You do not have to take it so seriously – the world won’t end if you get root-lifting mousse on the door, after all.

First Look: Sigma F80 Flat Top Kabuki

An awesome friend (we’ll call her C) of mine recently decided to gift me a brush, and let me choose what brush it was – I chose a Sigma F80 Flat Top Kabuki! The Sigma F80 Flat Top Kabuki had been on my lust list for a while after hearing Jaclyn Hill rave about this brush in, oh, every video she has, so this was very exciting. Most of my brushes are what would be considered low-to-mid-end – I got the Coastal Scents Elite set on sale for something like $25, and the rest are random – cheap brushes that I thought would be “throwaways,” that turned out to be awesome, a few (inexpensive but great) bdellium tools and two Real Techniques. Word on the street is that Sigma is as good as (perhaps better than) MAC at a nicer price.

The outer shipping box had been manhandled by USPS and was not a maiden fair, so we’ll start the unboxing here:

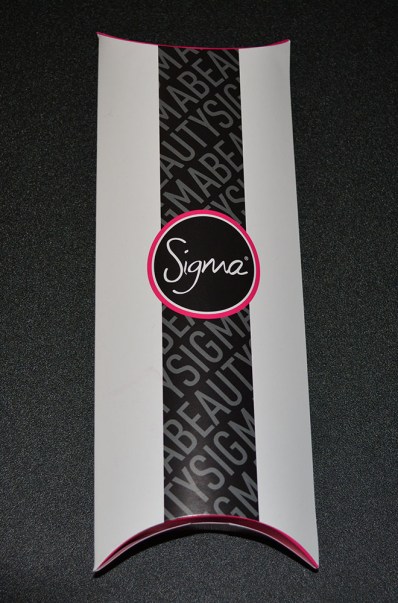
Sigma F80 Flat Top Kabuki - Packaging

Also, let it be known that said friend is not affiliated with Sigma. She didn’t get a freebie for the sake of promotion, either. She’s just awesome! Here’s the rest of what was in the shipping box, including the brush that has been removed from the fancy sleeve depicted first:

Sigma F80 Flat Top Kabuki - everything that was in the shipping box

The protective sleeve you see on the brush, below is actually two parts. The lower handle is covered with a cellophane piece (with an awesome holographic Sigma sticker), and the upper handle and head are protected by a thicker, rigid plastic piece. They mean business about packing and protecting their product.

Sigma F80 Flat Top Kabuki - Unboxed

This sucker will be an important part of my foundation routine – especially come July, as I am not hiring a makeup artist for my wedding. So pristine!

Sigma F80 Flat Top Kabuki - Unboxed 2

Hello, gorgeous. I can’t wait to awkwardly stipple and buff foundation into my face with you. Let’s face it, stippling looks awkward. You’re hitting yourself in the face rapidly. It is silly.

Sigma F80 Flat Top KabukiSigma F80 Flat Top Kabuki Brush

Take a look at how dense this brush is, perfect for buffing foundation in and building coverage. Though I plan to use it with a liquid foundation (MUFE HD Invisible Cover in 118, Flesh), you could probably use this for mineral or powder foundation.

Sigma F80 Flat Top Kabuki - so dense!

I haven’t had the chance to use it yet (my skin has been wonky, but is almost 100% again) but I plan on using it tomorrow and am excited to see how awesome my very first Sigma brush is. Thank you again, C!

Disclosure: This post was not sponsored. That said, some of the links in this post are affiliate links – this means I may get a very small percentage of the sale if you decide to buy something. I only recommend products I’ve tried and verified as awesome.

Drugstore Gel Liner Comparison

So as you may or may not know, L’Oreal has a diverse portfolio of brands under its control. They own some high end names that you would be surprised about, but also some drugstore ones aside from the eponymous L’Oreal, but also Maybelline.

When I first started playing with makeup like a child learning how to do my makeup, I decided to try a gel liner. Pencil liners always seemed odd to me, and liquids were too prescise – gel seemed like a happy medium. After a good bit of research into the gel options, I was torn between Maybelline and L’Oreal – both are well-reviewed. I happened to have a coupon for the Maybelline one and a sale was running (yes, why pay retail?) so I went with it and was content.

Later (aka recently), once I was on the verge of running out of usable product (my own error caused it to dry out prematurely), I decided to purchase both and do drugstore gel liner comparison. Here, you have the L’Oreal Infallible Gel Lacquer Liner 24 Hour on the left and the Maybelline Eye Studio Lasting Drama Gel Eyeliner.

Drugstore Gel Liner Comparison - L'Oreal Infalliable Lacquer Liner 24Hour and Mabelline Eye Studio Lasting Drama Gel LinerDrugstore Gel Liner Comparison

This post is pretty photo-heavy, so please continue after the jump.

Read more

Milani Eye Tech Extreme Liquid Eye Liner

Milani Eye Tech Extreme

When I heard Milani Eye Tech Extreme may be a reasonable dupe for Stila Stay All Day Liquid Liner, I had to look into it. Glorious as the felt-tip liner from Stila is, it is about $20 for a full size at regular price, which makes me kind of sad. This product, however, is only about $7-8.

Featuring a fine felt tip, the Milani Easy Tech Extreme liquid liner is structured very similarly to the Stay all Day and should be able to product similar results. According to Milani’s Site:

Non-feathering, waterproof blackest black formula lasts all day without flaking our budging.

I tested it out to see how well it met that claim. Here are the pictures, taken and laid out similarly to the Stila test.

Read more